오늘은 UIKit에서 화면전환을 하는 방법을 알아보자.
instantiateViewController
Creates the view controller with the specified identifier and initializes it with the data from the storyboard.
애플 문서에서는 지정된 식별자를 가지고 스토리보드의 데이터를 초기화해서 뷰 컨트롤러를 만든다.라고 설명하고 있다.

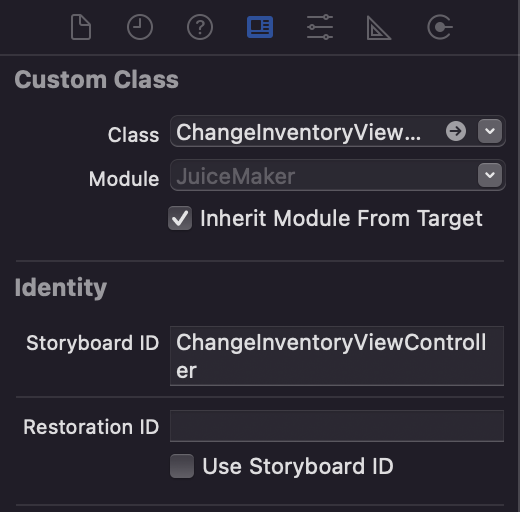
Storyboard id를 뷰 컨트롤러의 식별자로 사용한다.
instantiateViewController를 이용하여 뷰 컨트롤러를 생성할 때 마다 데이터는 초기화되고 새로운 인스턴스가 생성되기 때문에 이전에 생성했던 데이터를 사용할 수 없다. (ex> 다른 뷰 컨트롤러로 넘어갔다가 돌아오는 경우)
|
|
- “ChangeInventoryViewController"라는 식별자를 가진 뷰 컨트롤러를 생성하고 스토리보드의 데이터를 초기화한다 = 새로 만들어주겠다는 의미
as? ChangeInventoryViewControlleras를 이용하여ChangeInventoryViewController클래스로 타입 캐스팅하여 사용한다.
presentChangeInventoryViewController라는 이름의 함수에서 instantiateViewController 메소드를 사용해 주었다.
performSegue
Initiates the segue with the specified identifier from the current view controller’s storyboard file.
현재 뷰 컨트롤러의 스토리보드 파일에서 지정된 식별자로 segue를 시작한다고 애플 문서에서 설명한다.

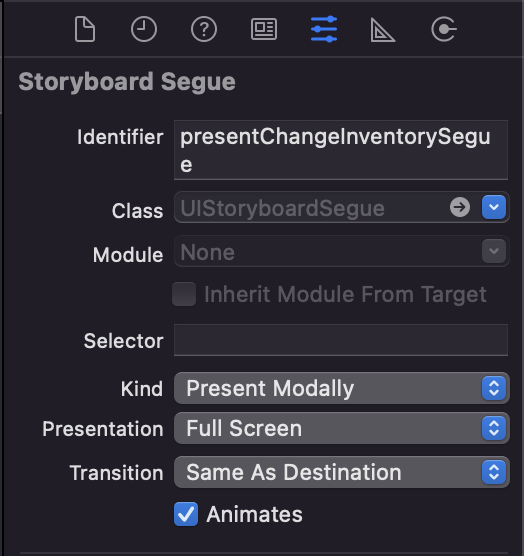
segue에 정의된 identifier를 사용하여 segue를 시작한다.
|
|
화면전환이 일어나기 전에 무조건 뷰 컨트롤러의 prepare(for:sender:)가 호출되기 때문에 데이터를 전달해주고 싶은 경우 오버라이드하여 뷰 컨트롤러의 데이터를 전달할 수 있다.
|
|
Reference
Apple - instantiateViewController(withIdentifier:)
Apple - performsegue
Apple - prepare(for:sender:)
