
UITableView
테이블 뷰는 하나의 컬럼안에 수직으로 스크롤 되는 여러개의 Section과 row을 가진다.
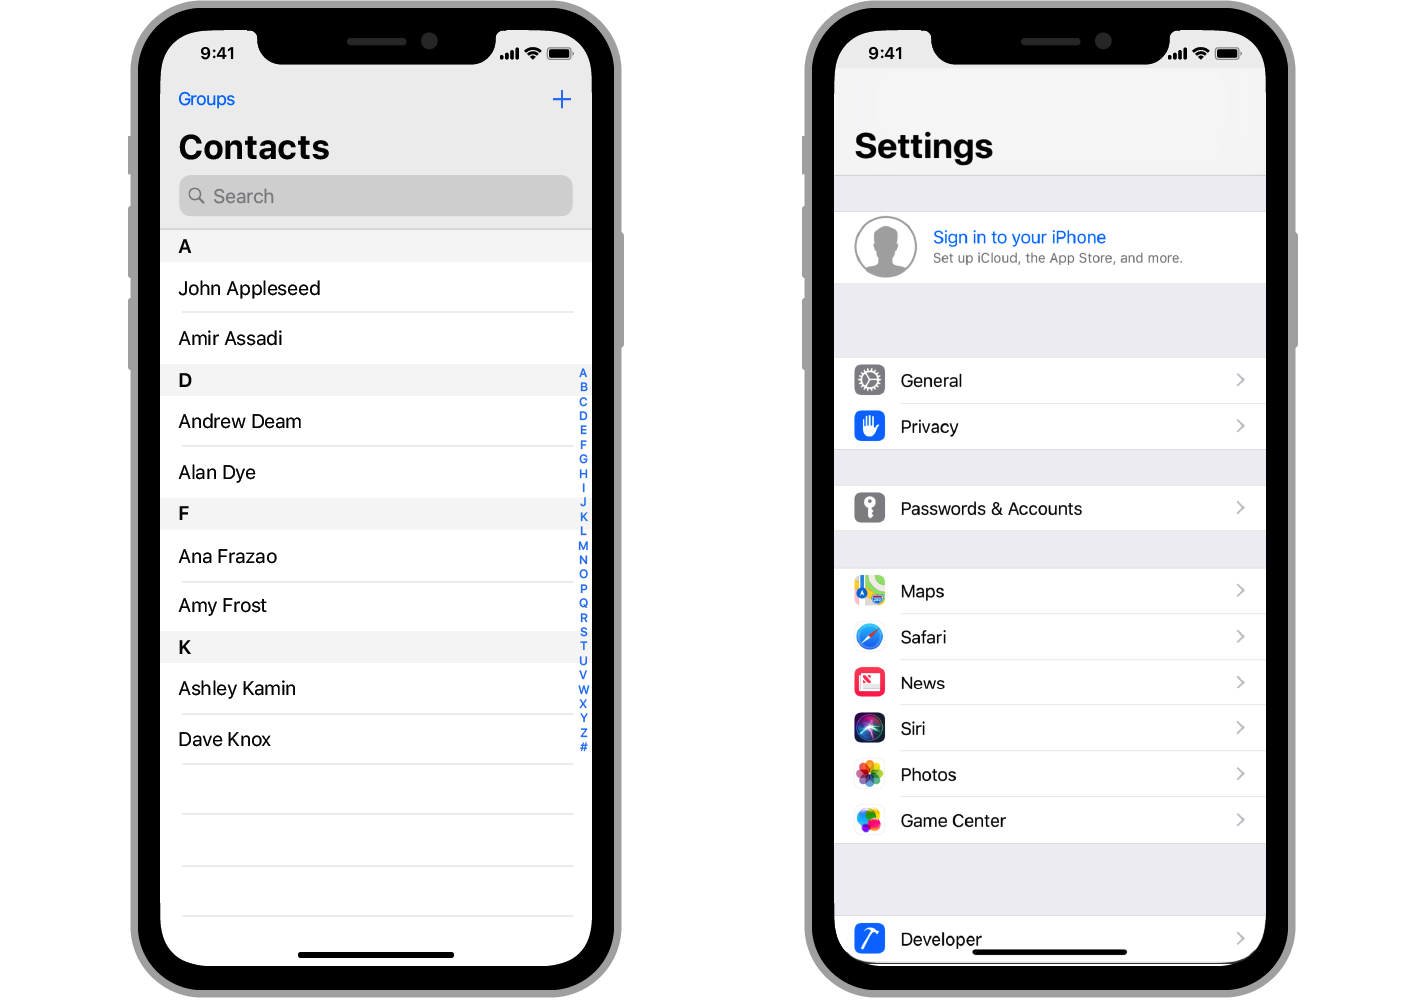 왼쪽 이미지와 같이 하나의 섹션안에 여러개의 row가 있을 수도 있고, 오른쪽 이미지처럼 여러개의 섹션안에 여러개의 row가 있을 수도 있다.
Table View의 구성요소
- Cell : 하나의 행에 표현될 데이터를 담아주는 역할
- TableView Controller : 테이블 뷰를 관리하는 객체
- DataSource : 테이블 뷰의 데이터를 관리하는 객체
- iew Delegate : 테이블 뷰의 행을 선택하거나 편집하는 등의 테이블 뷰의 행동을 관리하는 객체
UITableViewCell
테이블 뷰에서 단일 행을 관리하는 객체
- 셀 선택, 강조 색상 적용
- detail 이나 disclosure control과 같은 accessory views 추가 가능
- 편집 가능한 상태로 만들기
- 들여쓰기 해서 테이블에 계층적 구조 표현 가능
UITableViewDataSource
테이블 뷰의 데이터를 관리하는 프로토콜
- 테이블의 section과 row의 개수를 보고
- 테이블에 표시할 각 row에 표시할 셀을 제공
- section의 header와 footer의 타이틀을 제공
아래의 두 메서드는 필수로 구현해야 한다.
|
|
UITableViewDelegate
선택 항목을 관리하고 셀의 행동을 관리하는 프로토콜
- custom header나 footer를 만들고 관리
- row, header, footer의 높이를 설정
- row를 선택하거나 내용 들여쓰기 등의 행동을 관리
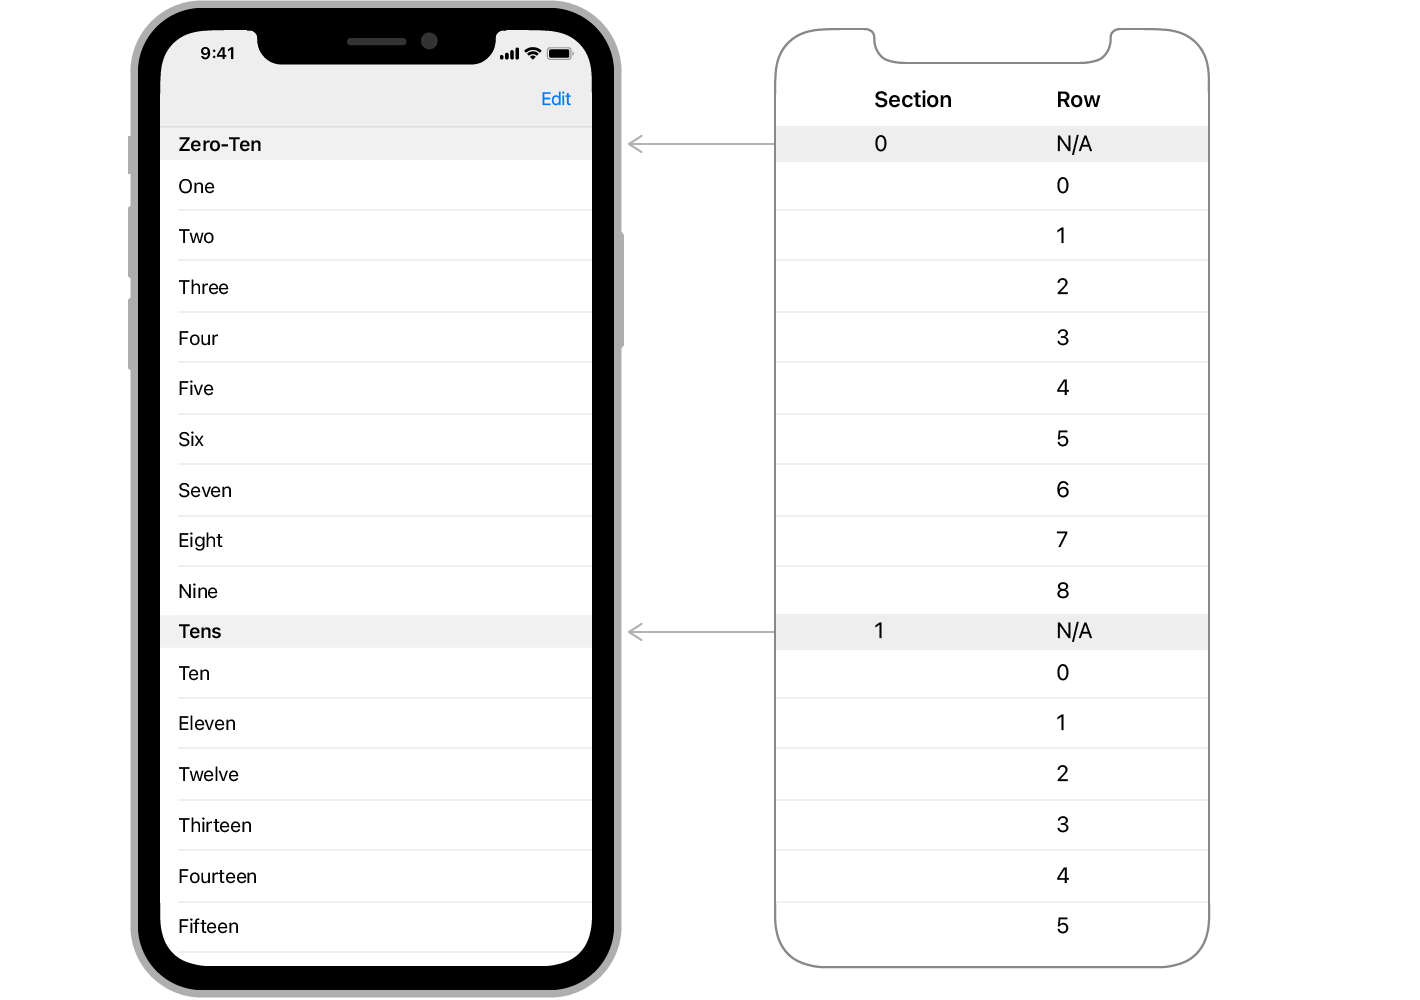
테이블 뷰는 indexPath를 사용하여 행과 섹션을 식별하고 row와 section 프로퍼티를 사용
Filling a table with data
Provide the numbers of rows and sections
화면에 표시되기 전 테이블 뷰는 섹션과 행의 개수를 지정해야 한다. 이를 위해 DataSource는numberOfRowsInSection과 numberOfSections 메서드를 사용해 정보를 제공한다.
|
|
아래의 예제를 살펴보자.
|
|
Define the appearance of rows
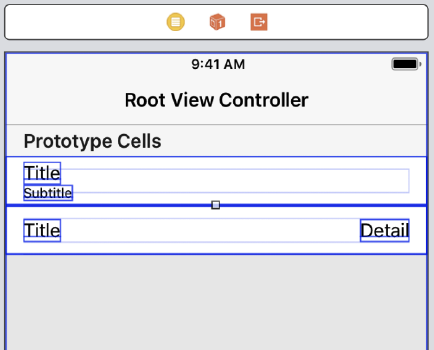
cell을 사용하여 스토리보드에서 row를 정의할 수 있다.
UITableViewCell을 UITableView에 추가하면 하나의 프로토타입 셀이 생성되고, 셀의 Identifier를 지정하여 셀을 식별할 수 있다.
이 셀을 커스터마이징하려면 UITableViewCell의 서브클래스를 만들고 스토리보드에서 셀을 추가하고 클래스를 지정해 주면 된다.
Create and configure cells for each row
테이블 뷰가 화면에 나타나기 전에 데이터 소스 객체에 테이블에 보여지는 부분과 주변의 셀을 제공하도록 요청해야 한다.
데이터소스 객체는 tableView(_:cellForRowAt:) 메서드를 사용하여 셀을 제공한다.
- 테이블 뷰의
dequeueReusableCell(withIdentifier:for:)메서드를 사용하여 셀을 가져온다. - 앱의 커스텀 데이터를 가지고 셀의 뷰를 구성한다.
- 테이블 뷰에 셀을 반환한다.
💡 주의사항❗️
메모리를 절약하기 위해 테이블 뷰와 주변의 몇개의 셀만 생성하고 셀을 재사용하게 되는데, 이것은 곧 데이터소스 객체가 셀을 빠르게 생성하고 반환해야 한다는 의미이다.
➡️ tableView(_:cellForRowAt:) 메서드는 테이블 뷰가 셀을 요청할 때마다 호출되기 때문에 메서드 안에 테이블의 데이터를 로드하거나 긴 작업을 수행하지 말아야 한다.
예제
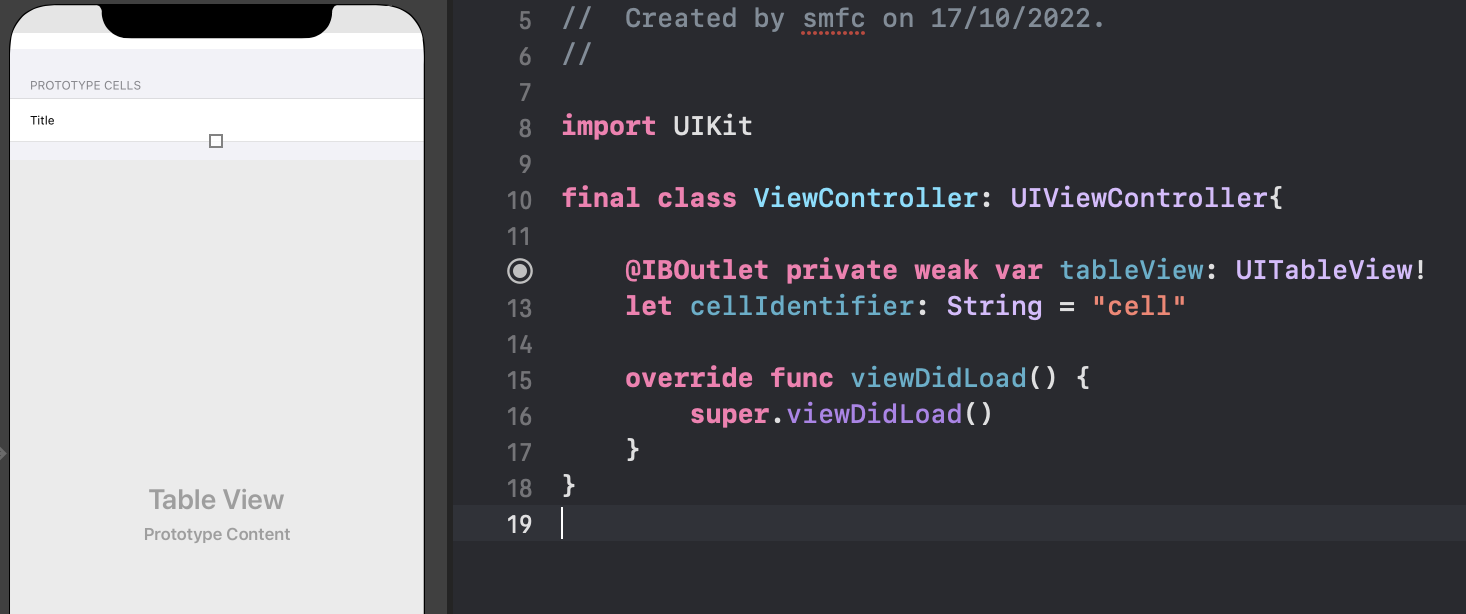 스토리보드에 테이블뷰를 추가하고 사방으로 제약을 0으로 걸어준다.
Basic 스타일의 셀을 하나 추가하고 Identifier를 cell로 지정해준다.
 extension을 사용하여
 UITableViewDataSource를 채택하고
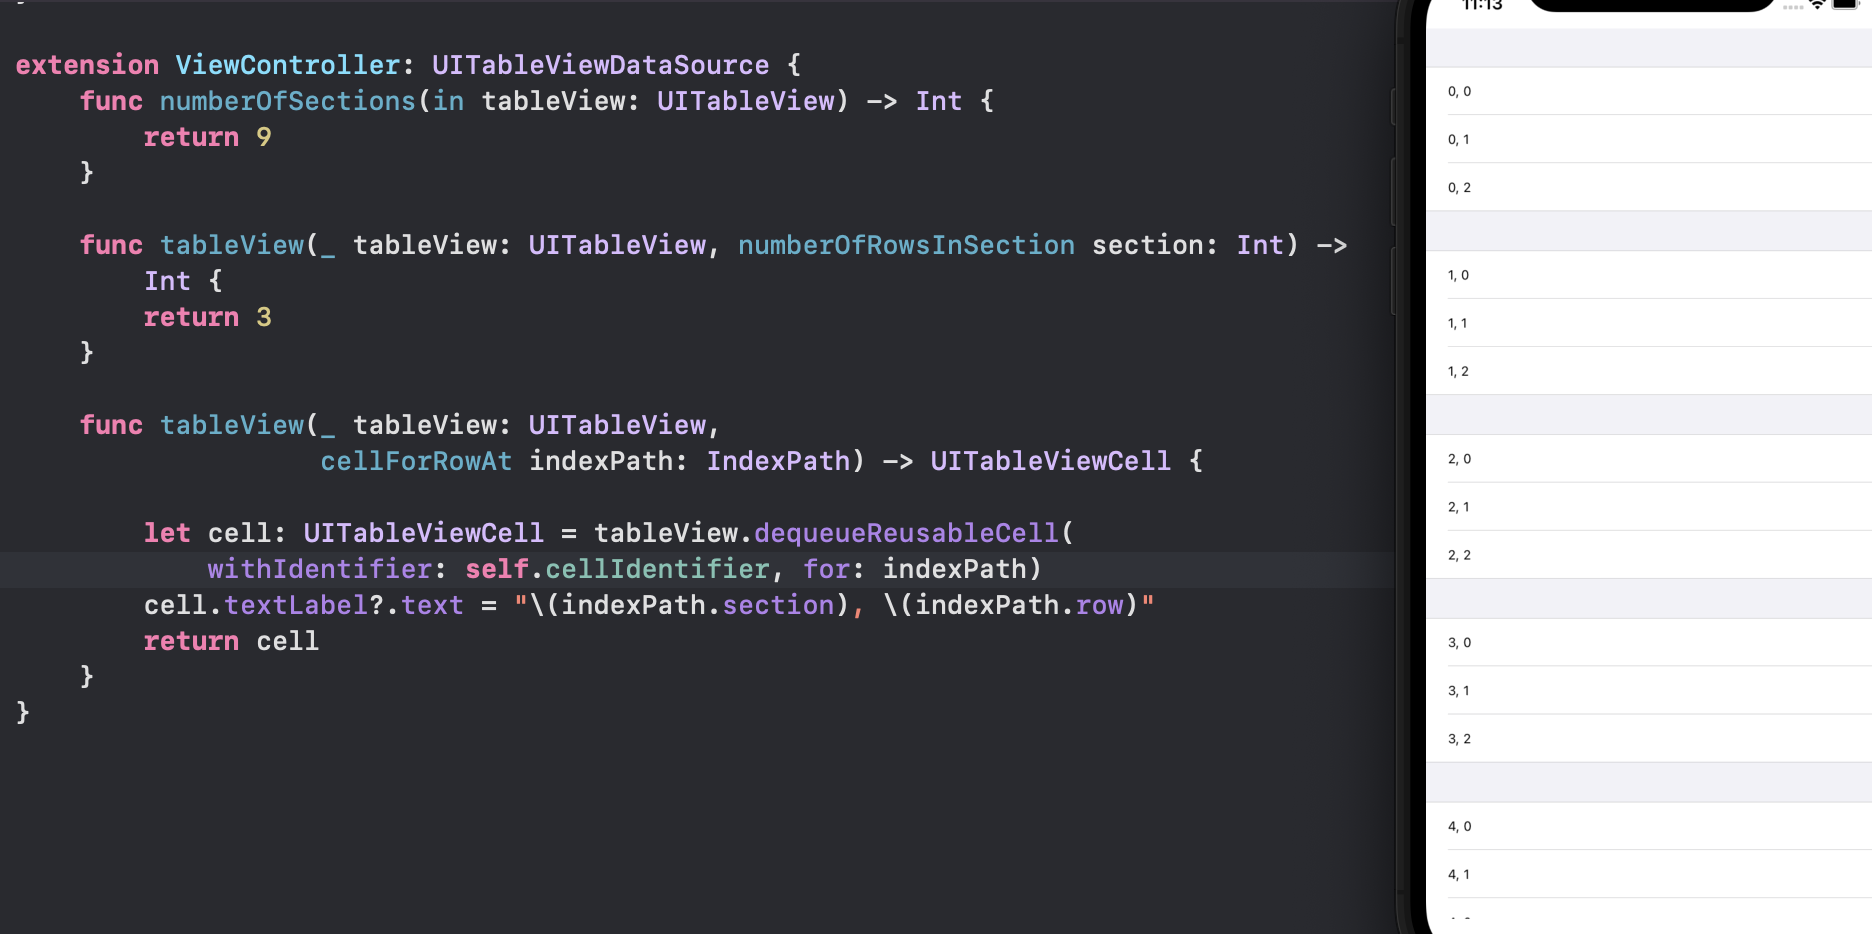
필수 메서드인 numberOfRowsInSection과 cellForRowAt 메서드를 구현해준다.
row의 개수는 3개, numberOfSections 메서드를 사용하여 섹션도 9개로 만들어 주었다.
numberOfRowsInSection 메서드에서 cell의 레이블에 섹션과 row의 정보를 넣어주었다.
 extension을 사용하여
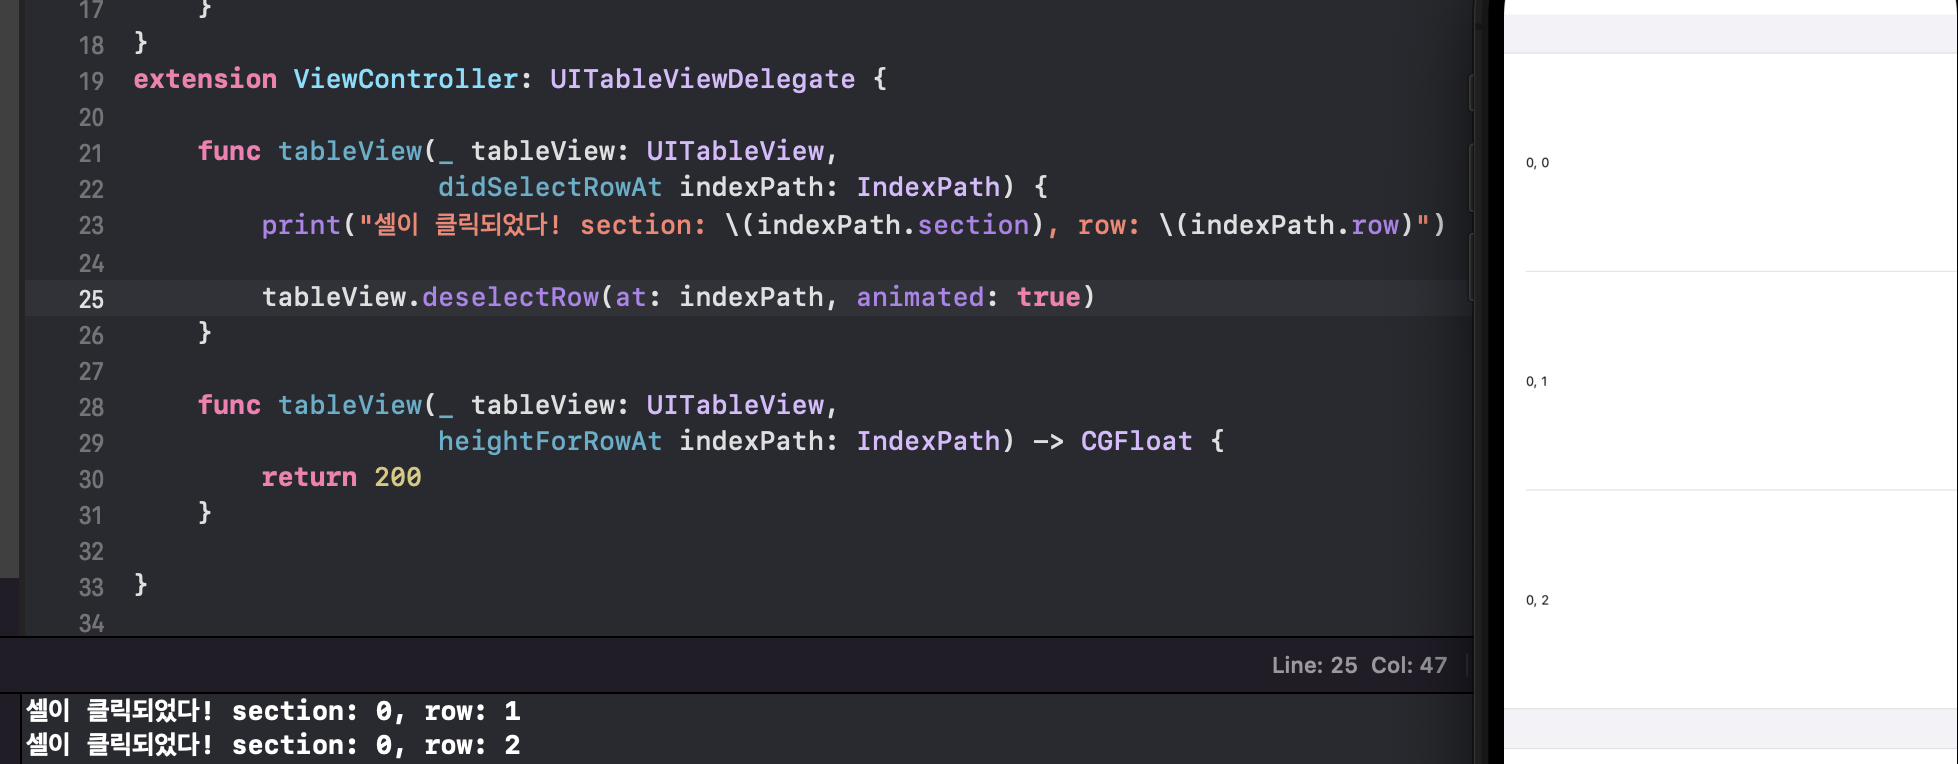
 UITableViewDelegate를 채택하고
셀이 선택되었을 때 실행되는 didSelectRowAt 메서드를 구현하여 콘솔에 선택된 셀의 정보를 출력해 주었다.
25번째 줄에서 deselctRow 메서드를 사용하여 선택된 셀을 해제해 주었다.
heightForRowAt 메서드를 사용하여 셀의 높이를 지정해 줄 수도 있는데 여기에서는 셀의 높이를 200으로 지정해 주었다.
|
|
Reference
Swift Documentation - UITableView
Swift Documentation - UITableViewCell
Swift Documentation - UITableViewDataSource
Swift Documentation - UITableViewDelegate
Filling a table with data
Configuring the cells for your table