Foundation 프레임워크에서 Swift 문법 공부만 하다가 이제 드디어 UIKit을 사용해보게 되었다.
Alert을 구현해보고 싶었는데 어떻게 할지 몰라서 찾아보고 미래의 나를 위해 포스팅한다.
Alert - Human Interface Guidelines
An alert gives people critical information they need right away.
HIG 문서에서는 Alert을 사람들에게 필요한 정보를 즉시 제공하는 컴포넌트라고 정의되어 있다.
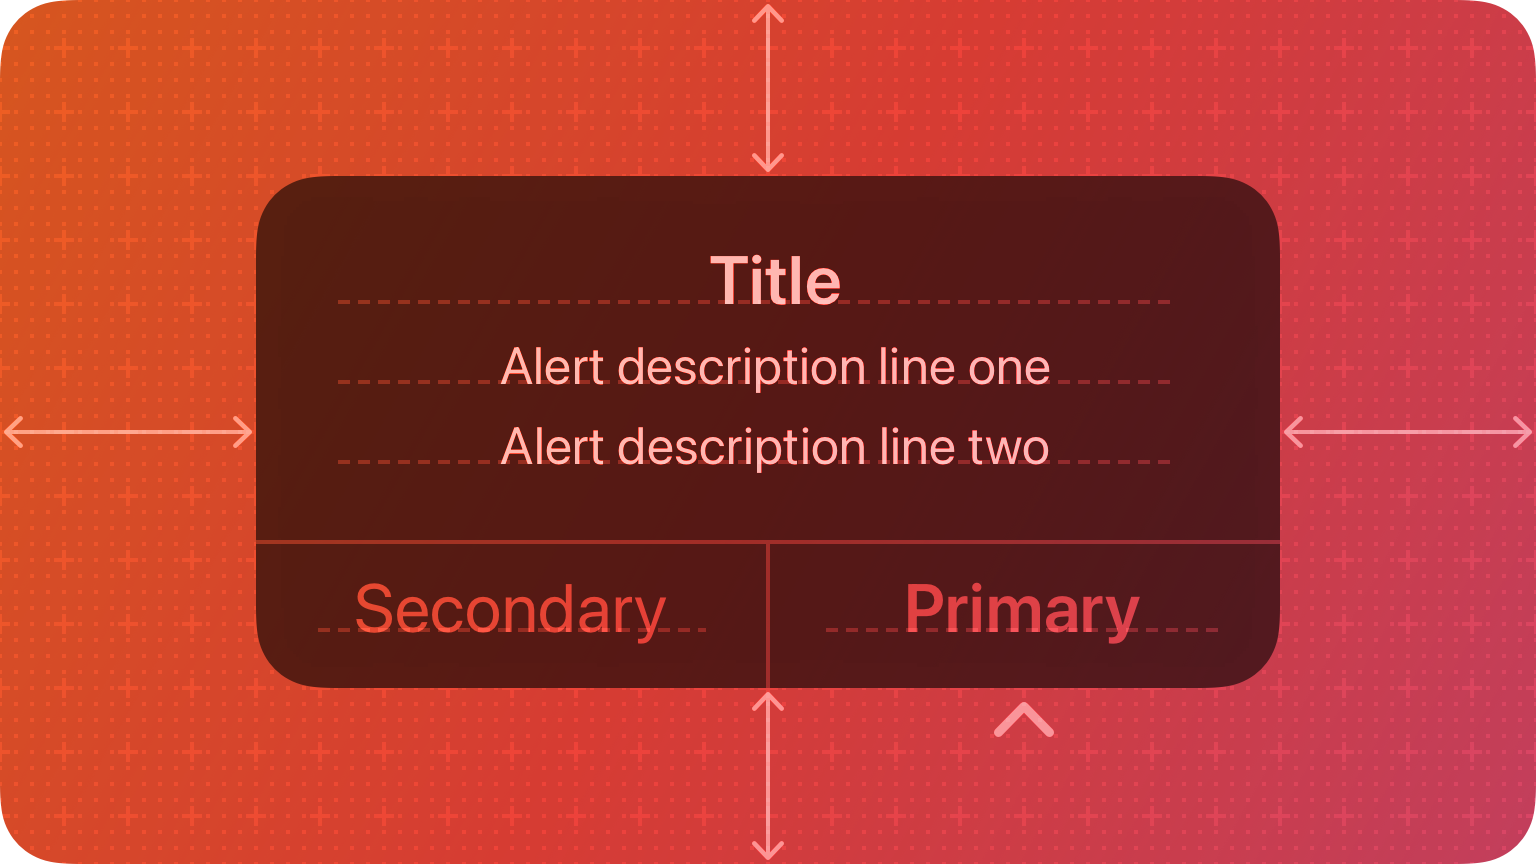
alerts display a title, optional informative text, and up to three buttons
➡️ 제목과 선택적 정보 텍스트, 최대 3개의 버튼을 표시할 수 있다. (하지만 얼럿에서 3개의 버튼은 보지 못한거 같다.)
Place buttons where people expect. In general, place the button people are most likely to choose on the trailing side in a row of buttons or at the top in a stack of buttons. Always place the default button on the trailing side of a row or at the top of a stack. Cancel buttons are typically on the leading side of a row or at the bottom of a stack.
✅ 사람들이 기대하는 곳에 버튼을 놓고 - 일반적으로 사용자가 선택할 가능성이 가장 높은 버튼을 제일 뒤에 위치시키고, 취소 버튼은 일반적으로 맨 앞에 위치.
Identify destructive buttons. If an alert button results in a destructive action, like deleting content, specify the destructive button style to help people recognize it.
✅ 얼럿 버튼이 내용 삭제와 같은 파괴적인 결과를 나타낸다면 destructive 스타일로 지정하여 사람들이 인지할 수 있도록 한다.
Always use “Cancel” to title a button that cancels the alert’s action.
✅ 얼럿을 취소하는 버튼의 이름은 항상 Cancel(취소)로 한다.
you can use “OK” for acceptance, avoiding “Yes” and “No”
✅ 간단한 승인을 위해서 OK를 사용해도 되지만 Yes(예)와 No(아니오)를 사용하지 않는다.
Enable alternative ways to cancel an alert when it makes sense.
✅ 경고를 취소하는 다른 방법을 활성화한다. iOS에서는 홈 화면으로 이동하거나 연결된 키보드의 esc키를 누르는 방법으로도 취소할 수 있어야 한다.
Alert 만들기
IBAction 만들기
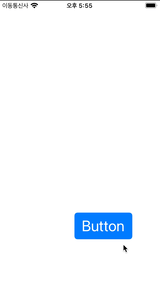
StoryBoard에서 버튼을 하나 생성해주고 Ctrl버튼을 누른채로 코드쪽으로 드래그 하면 IBAction이 생성된다.
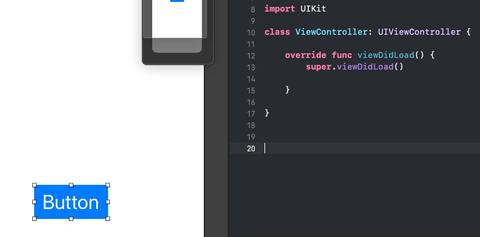
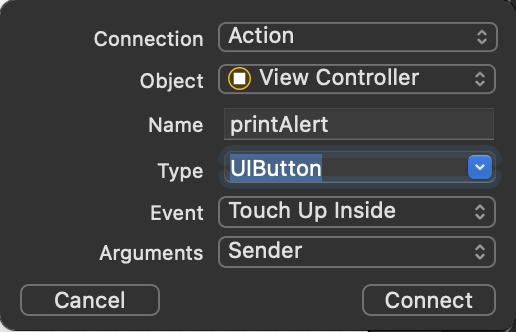
IBAction 함수가 생기는데 이 함수 내부에 코드를 작성해줄 것이다.
Alert 설정
|
|
preferredStyle에 .alert를 사용하면 알림창이 나오고, .actionSheet을 사용하면 액션시트가 나온다.
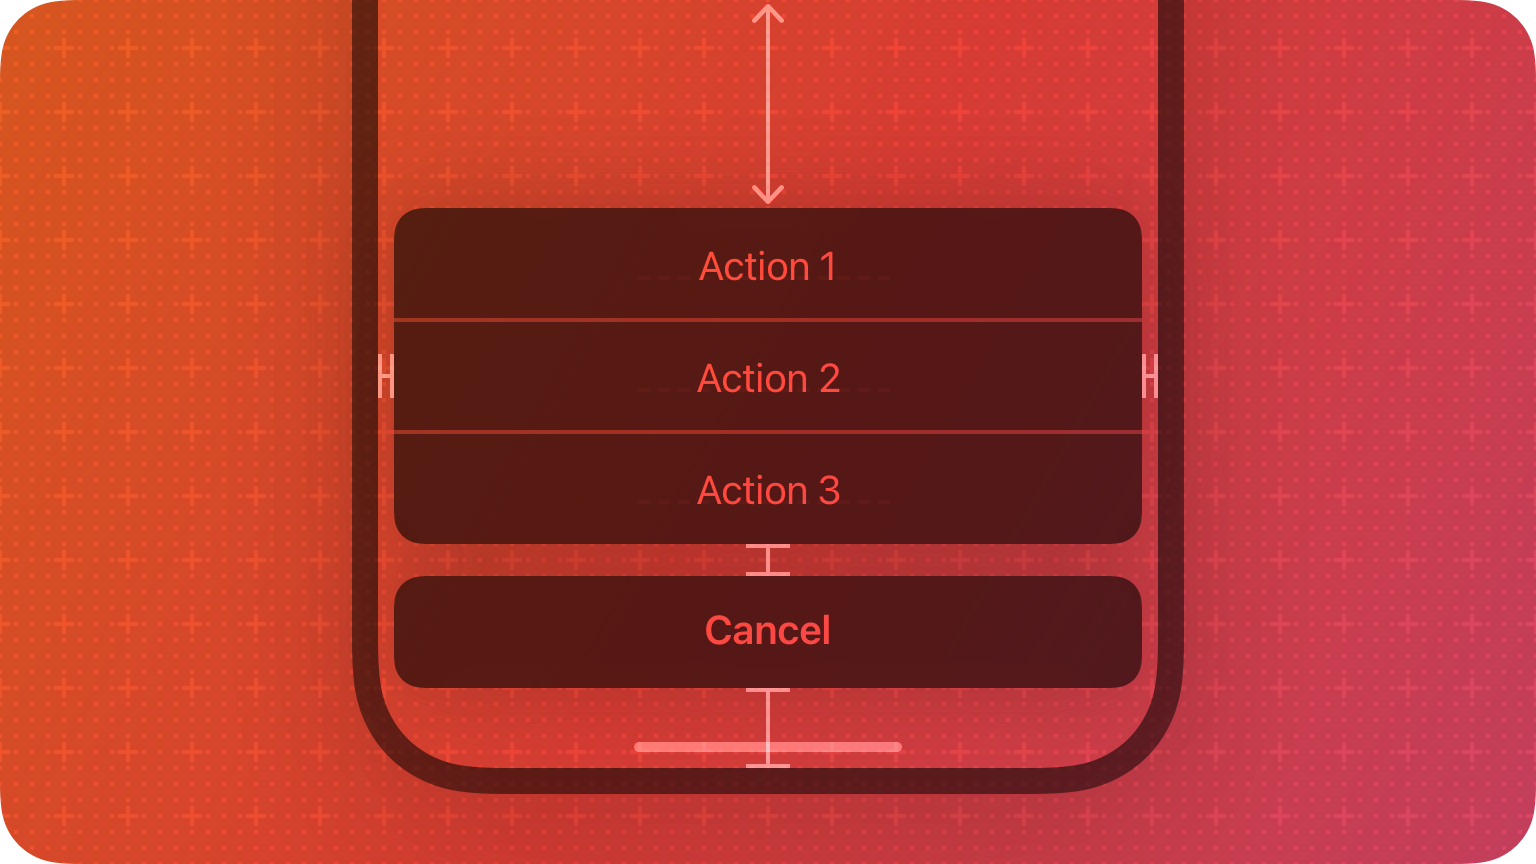 아래에서 위로 올라오는 이렇게 생긴 녀석이
 actionSheet이다.
Alert에 들어갈 Action 버튼 설정
얼럿에서 노출되는 버튼을 따로 구현해 주어야 한다.
|
|
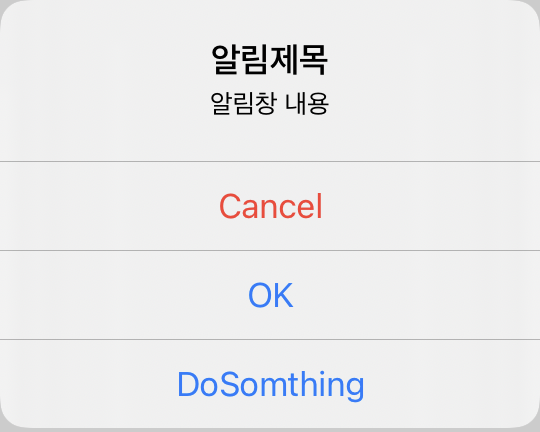
style에서 cancel이 default보다 굵은 글씨로 노출되고, destructive는 빨간색으로 노출된다.
handler에서는 사용자가 버튼을 누르면 어떤 일이 일어날지 정의해준다. 클로저를 열어서 버튼 클릭 시 작동할 코드를 적어주면 된다. nil 작성 시 얼럿만 닫히고 아무 일도 일어나지 않는다.
|
|
Alert에 액션 버튼을 추가해주기
얼럿의 제목과 메세지를 보여주는 얼럿 프레임(?)과 얼럿의 버튼이 될 액션 버튼을 정의해 주었으니, 이제 얼럿에 추가해주는 작업을 해 주어야 한다.
|
|
❗️ 추가하는 순서대로 얼럿 버튼이 노출된다. 처음 읽었던 HIG에 따르면 취소 버튼은 제일 앞에 위치해야 하기 때문에 제일 먼저 추가해주어야 한다.
액션버튼을 정의해 줄 때 cancel 버튼의 스타일을 destructive로 설정했기 때문에 빨간색으로 노출된다.

|
|
handler에 클로저를 적용한 something도 추가해 보았다. HIG에 버튼은 최대 3개까지 추가할 수 있다고 해서 어떻게 노출되는지 궁금했다. DoSomething을 선택하면 클로저에 작성한 print문이 실행된다.
Alert view 화면에 뜰 수 있게 설정
|
|
present메소드를 사용해서 얼럿을 뜨게 만들어 준다.
animated는 얼럿이 노출될 때 어떤 애니메이션을 적용할지 설정한다.
true로 설정하면 부드럽게 뜨고, false로 설정하면 바로 뜨게 된다.
completion은 completion: { }) 형태로 클로저 안에 코드를 작성해 줄 수 있다.
해당 얼럿이 노출되고 추가로 할 일을 지정해 줄 수 있겠다.
animated-true |
animated-false |
|---|---|
 |
 |
요약
- 얼럿 Frame을 만들어 준다.
|
|
- 액션 버튼을 정의해준다.
|
|
- 얼럿 frame과 버튼을 addAction 메서드를 이용해서 바인딩해 준다.
|
|
present메소드를 사용해서 얼럿을 뜨게 만들어 준다.
|
|
Full Code
|
|
Reference
Apple HIG - Alerts
Apple HIG - Action sheets
Zedd - 왕초보를 위한 Alert View사용해보기
Ari - Alert 알림창을 만들어보자