Featured image of post Auto Layout(5) - Constraints with Code

Auto Layout(5) - Constraints with Code

스토리 보드를 이용하지 않고 코드로 제약을 만드는 방법

  1. Layout Anchors
  2. NSLayoutConstraint Class
  3. Visual Format Language (이 방법은 비추천)

Preview - 스토리 보드를 이용하는 방법

img
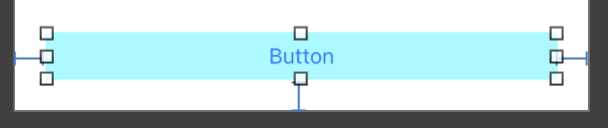
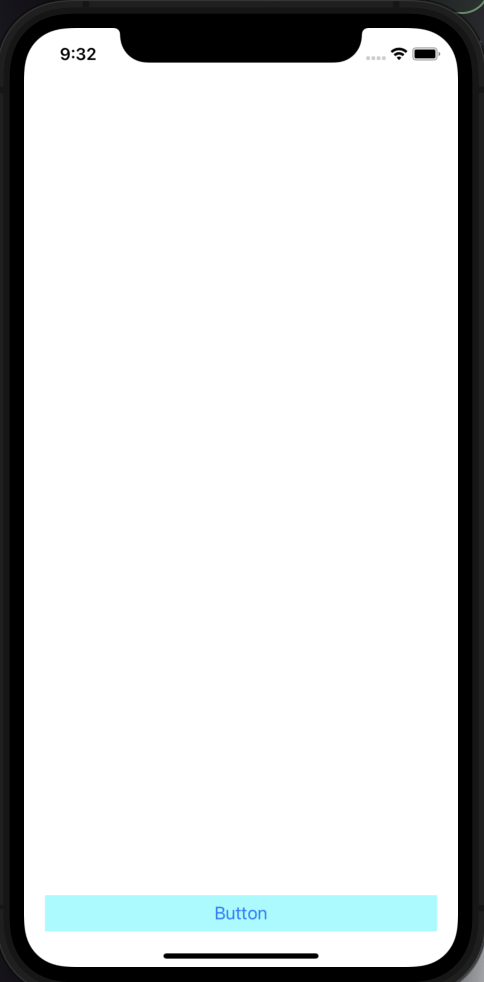
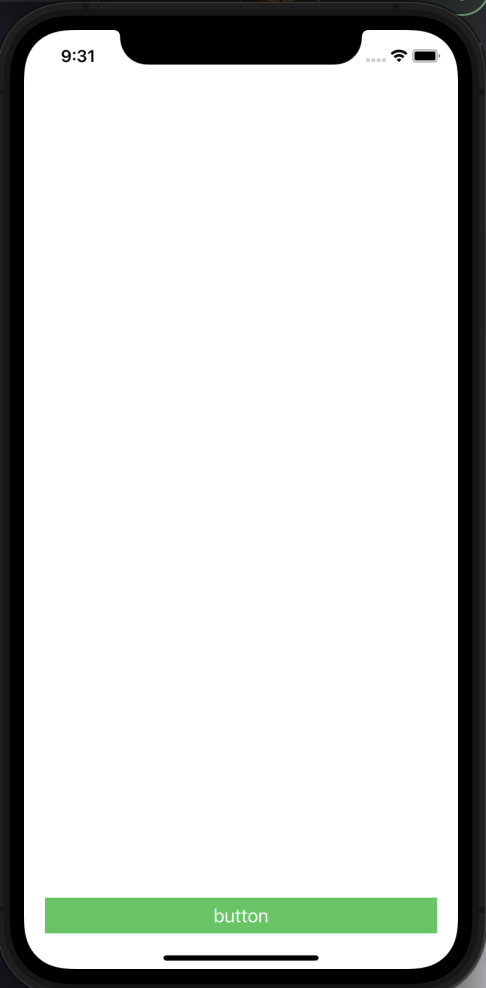
만약 하단의 버튼을 좌,우 아래쪽에 20의 여백울 준 다음, 홈버튼이 없는 아이폰으로 변경해 보면 하단 여백이 더 길게 보이게 된다.

img

img
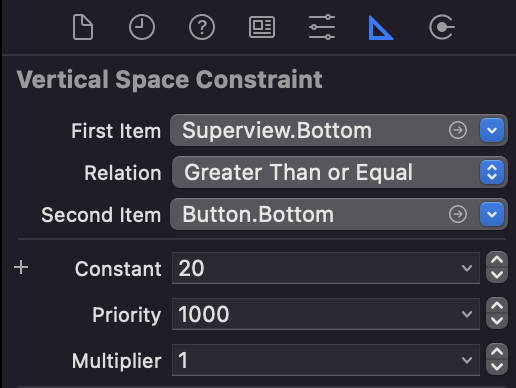
Safe Area가 아니라 SuperView에서 20보다 크거나 같다고 지정해 주고,
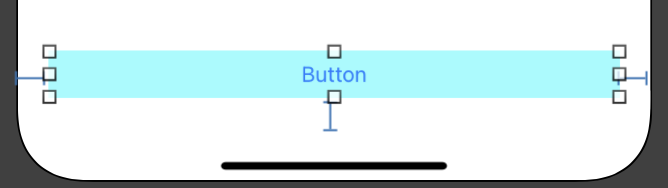
Button의 bottom을 SafeArea의 bottom과 같게 지정해 주면 된다.

img
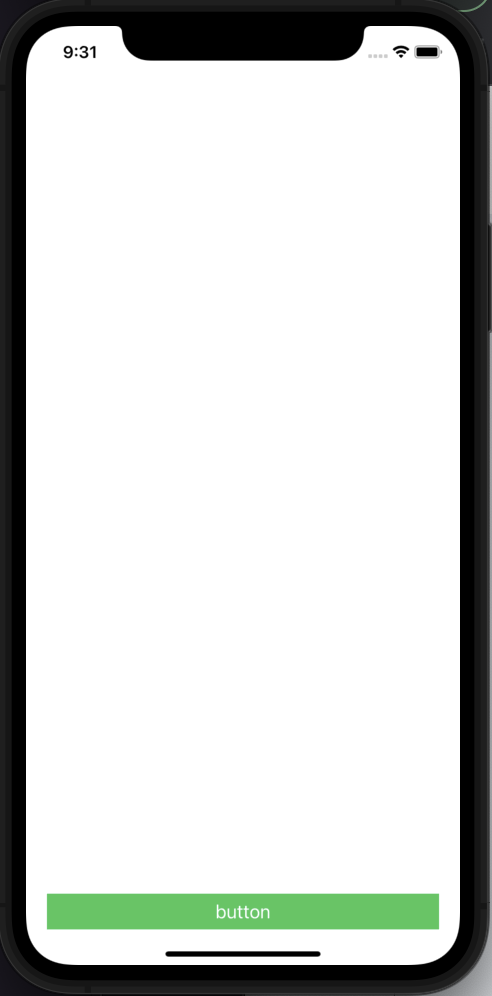
하지만 이 상태에서 다시 작은 화면의 기기로 변경하면 Safe Area가 없기 때문에 바닥에 붙어서 보이게 된다. 우리는 20만큼 떨어트리고 싶기 때문에, button의 bottom 제약의 priority를 20만큼의 간격을 갖는 제약보다 낮게 지정해 주면 된다.

Layout Anchors

각각의 attribute에 앵커를 건다. 가장 간단하고 안전한 방법이다.
약간의 한계가 존재하기 때문에 NSLayoutConstraint Class를 이용할 수도 있지만 대부분의 경우에는 Layout Anchors를 이용하면 된다.

 1
 2
 3
 4
 5
 6
 7
 8
 9
10
11
12
13
14
15
16
17
18
19
20
21
22
23
24
25
26
27
28
29
30
31
32
33
34
35
36
37
38
39
40
41
42
43
class AnchorViewController: UIViewController {

  override func viewDidLoad() {
      super.viewDidLoad()

      //버튼 생성
      let button = UIButton()
      button.setTitle("button", for: .normal)
      button.setTitleColor(.white, for: .normal)
      button.backgroundColor = .systemGreen
      view.addSubview(button)

      button.translatesAutoresizingMaskIntoConstraints = false
      //오토리사이징 마스크라는것을 오토레이아웃의 constraints로 자동으로 변경해줄 것인지
      //제대로 이해하고 사용할 것이 아니면 해제해 주는 것이 좋다.

      //MARK: -  버튼에 Anchor 사용하기
      let safeArea = view.safeAreaLayoutGuide //safeArea의 영역을 나타내주는 가이드

      //버튼 왼쪽이 safeArea 가이드라인 왼쪽과 16만큼 떨어져있다
      button.leadingAnchor.constraint(equalTo: safeArea.leadingAnchor,
                                      constant: 16).isActive = true
      // constraint라는 메서드가 return값으로 'NSLayoutConstraint' 클래스의 인스턴스를 만들어 주기 때문에
      // 경고가 떠서 뒤에 .isActive = true 를 넣어줘서 앵커를 만들어주자마자 활성화 시켜준다
      // let leadingAnchor = 으로 선언하고 아래에서 사용해도 된다.

      //버튼 오른쪽 safeArea 가이드라인 오른쪽에서 왼쪽으로 16만큼 떨어져 있다(안으로 들어와야 하기 때문에 음수)
      button.trailingAnchor.constraint(equalTo: safeArea.trailingAnchor,
                                       constant: -16).isActive = true

      //버텀 앵커 제약 1 = 버튼바닥이 safeArea 가이드라인 바닥과 같다.
      let safeBottomAnchor = button.bottomAnchor.constraint(equalTo: safeArea.bottomAnchor)
      safeBottomAnchor.isActive = true
      safeBottomAnchor.priority = .defaultHigh // = 750
      // priority를 원하는 숫자로 지정하려면 rawValue로 지정해주면 된다.
      // safeBottomAnchor.priority = .init(rawValue: 750)

      // 버텀 앵커 제약 2 = view의 바닥면에서 안쪽으로 20 보다 같더나 더 멀리 떨어져있다 (안쪽으로 와야 하기 때문에 -이고)
      // 20과 같거나 안쪽으로 더 많이 떨어져야 하기 때문에 greaterThan을 하면 0쪽으로 이동하고, lessThan을 써야함
      let viewBottomAnchor = button.bottomAnchor.constraint(lessThanOrEqualTo: view.bottomAnchor, constant: -20)
      viewBottomAnchor.isActive = true
  }
}

Pros and Cons

앵커를 사용하면 좋은 점은

  • 코드가 간결해지고 어떠한 제약이 걸려있는지 코드를 읽으면서 확인할 수 있다.
  • 컴파일 타임에 오류를 확인할 수 있다.(버튼의 leading과 SafeArea의 bottom을 연결한다거나..)

주의사항으로는

  • .isActive = true 를 해주지 않으면 제약조건이 적용되지 않는다.
  • 조건의 음수, 양수를 잘 생각해야 한다. (안쪽으로 들어와야 하면 음수, 밖으로 나와야 하면 양수)
  • 제약의 first, second Item의 관계를 잘 생각해야 한다.

NSLayoutConstraint Class

 1
 2
 3
 4
 5
 6
 7
 8
 9
10
11
12
13
14
15
16
17
18
19
20
21
22
23
24
25
26
27
28
29
30
31
32
33
34
35
36
37
38
39
40
41
42
43
44
45
46
47
48
49
50
51
52
53
54
55
56
57
58
59
60
import UIKit

class ConstraintViewController: UIViewController {

    override func viewDidLoad() {
        super.viewDidLoad()

        //버튼 생성
        let button = UIButton()
        button.setTitle("button", for: .normal)
        button.setTitleColor(.white, for: .normal)
        button.backgroundColor = .systemGreen
        view.addSubview(button)

        button.translatesAutoresizingMaskIntoConstraints = false

        let safeArea = view.safeAreaLayoutGuide //safeArea의 영역을 나타내주는 가이드

        //버튼 왼쪽이 safeArea 가이드라인 왼쪽과 20만큼 떨어져있다.
        let leading = NSLayoutConstraint(item: button,
                                         attribute: .leading,
                                         relatedBy: .equal,
                                         toItem: safeArea,
                                         attribute: .leading,
                                         multiplier: 1,
                                         constant: 20)
        leading.isActive = true  //이렇게 활성화해줘도 되고 맨 아래에서 한꺼번에 활성화할 수도 있다.

        //버튼 오른쪽 safeArea 가이드라인 오른쪽과 20만큼 떨어져있다(안으로 들어와야 하기 때문에 음수)
        let trailing = NSLayoutConstraint(item: button,
                                          attribute: .trailing,
                                          relatedBy: .equal,
                                          toItem: safeArea,
                                          attribute: .trailing,
                                          multiplier: 1,
                                          constant: -20)

        //버텀 앵커 제약 1 = 버튼바닥이 safeArea 가이드라인 바닥과 같다.
        let bottomSafeArea = NSLayoutConstraint(item: button,
                                                attribute: .bottom,
                                                relatedBy: .equal,
                                                toItem: safeArea,
                                                attribute: .bottom,
                                                multiplier: 1,
                                                constant: 0)
        bottomSafeArea.priority = .defaultHigh // Priority 750으로 낮춰주기

        // 버텀 앵커 제약 2 = view의 바닥면에서 안쪽으로 20 보다 같더나 더 멀리 떨어져있다 (안쪽으로 와야 하기 때문에 -이고)
        // 20과 같거나 안쪽으로 더 많이 떨어져야 하기 때문에 greaterThan을 하면 0쪽으로 이동하고, lessThan을 써야함
        let bottomView = NSLayoutConstraint(item: button,
                                            attribute: .bottom,
                                            relatedBy: .lessThanOrEqual,
                                            toItem: view,
                                            attribute: .bottom,
                                            multiplier: 1,
                                            constant: -20)

        NSLayoutConstraint.activate([trailing, bottomSafeArea, bottomView])
    }
}
  • 앵커를 사용하다 보면 가끔 안되는 경우가 있는데, 그러한 앵커의 한계점이 있을 때 NSLayoutConstraint을 사용하면 된다.
  • 앵커를 사용할 때와 달리, 컴파일러가 오류를 잡아주지 않기 때문에 주의해야 한다.

Outro

스토리 보드에 뷰 컨트롤러를 추가하고 각각의 ViewContrller를 할당하여 확인해 보면 동일한 제약조건이 적용된 것을 볼 수 있다.

img img img
StroyBoard Layout Anchors NSLayoutConstraint

Reference

Auto Layout Guide- Programmatically Creating Constraints
야곰닷넷 - 오토레이아웃 정복하기